Over Engineered Cornhole Boards
2014-08-02 written by: Brad
I have had so many requests to provide plans and step by step guide on how to build them that I went ahead made a pdf you can download by clicking here or on the image to the left that has the scaled templates and cut sheets. The full size templates must be printed on 8×14 (legal) paper and the print scale should be set to 100%.
Very important…check the measurements with a ruler after printing out the templates to ensure they are the correct size.

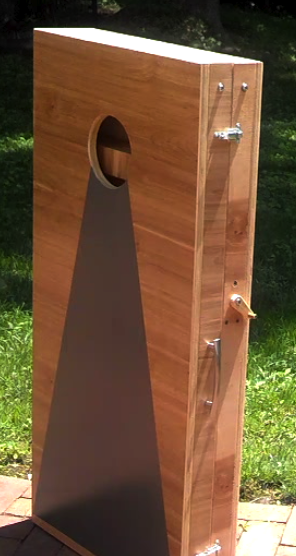
Typical Corn hole boards are fairly simple to build, but I wanted to incorporate a few features to simplify the setup, storage, and portability of the boards.
I designed the legs to fold away the same as most other corn hole boards, but my design gives more surface area where the legs contact the board while in the open position. Hopefully this will keep the legs from deforming over time
I added alignment pins so I could latch the two boards together. This shifts the weight of the boards to the pins during transport rather than the latches
The final feature I wanted to add was a way to measure out the distance for setup so we wouldn’t have to get a tape measure, or step off the distance every time.
The first step to building this set is to buy 3/4 sheet of plywood. It has to be 3/4 for the templates and measurements to work out, otherwise some of the measurements will be off and things will not work out right.
I had the guys at Lowes cut the sheet into 2 x 4 sheets so it would be easier to transport.
If you are lucky your sheets will not end up looking like this. The guy cutting mine obviously didn’t have any idea how to run the panel saw!
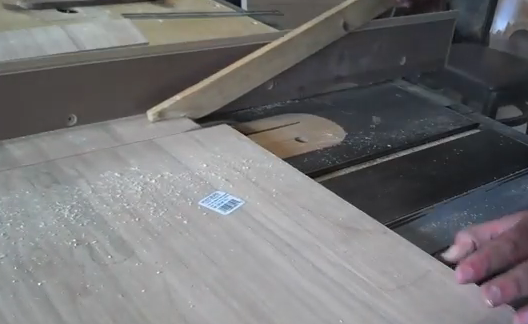
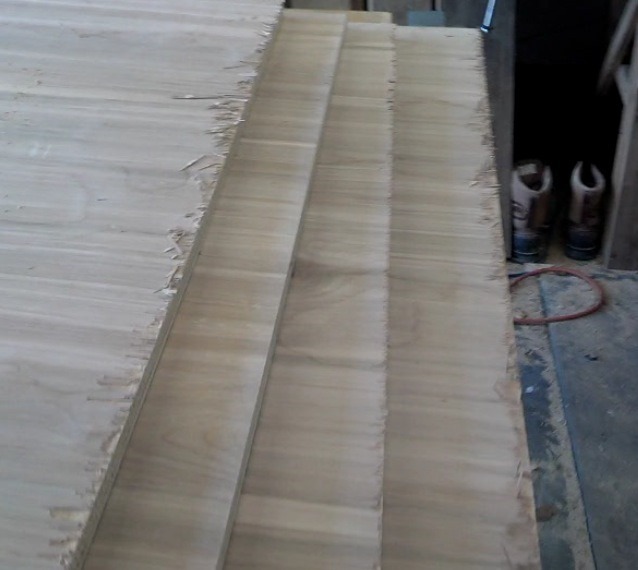
The next step is to cut out your parts referencing the cut sheet for the dimensions.
Set your table saw fence to 2 5/16” and cut out 13 strips that are 4’ in length
Then cut your board tops 3’ 11 1/2” x 1’ 11 1/2” (ACO Tournament Size)
Next take all of the 4 foot strips and cut them to the correct length for the various parts.
I set up a stop for my miter saw to speed up cutting all of the framing strips and leg parts to the correct lengths. This also helps with accuracy and ensures all like pieces are cut exactly the same.
Reference the cut sheet for dimensions of the parts.
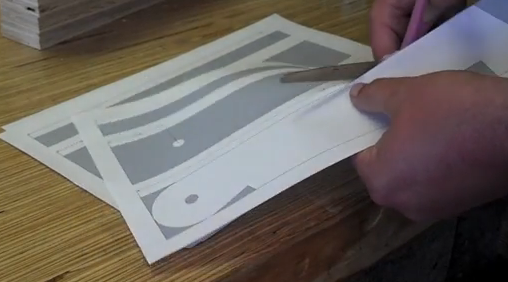
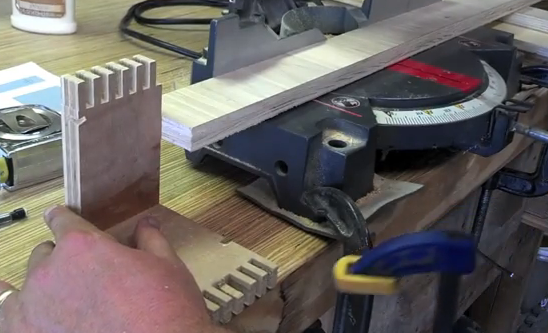
The next thing I did was cut out all of the parts that needed templates, such as the legs and gears.
I actually didn’t use the templates for the alignment pin holes or leg mount hole, but they are included in the downloadable plans if you want to use them.

Using the full size templates helps with cutting out the unique leg design/gears and aids with hole alignment and nail locations…if you are nailing them together…if you have more patients than me you could always glue and clamp the legs together. I burned all of my patients up cutting the gears out
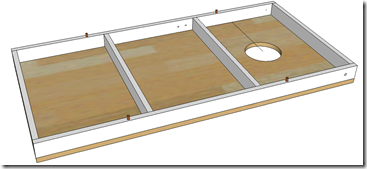
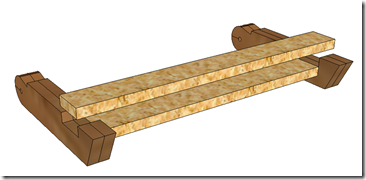
Building the main box is pretty simple. I didn’t take any photos or video of building that part so I’ll use my sketch-up drawing to illustrate.
Basically I just fit in the long parts of the frame ensuring they are flush with the sides and glued and nailed them in place, then fit in the end pieces and center supports in the same manner.
The two center supports just need to be spaced evenly apart, just make sure there is enough room for the legs to fold away.
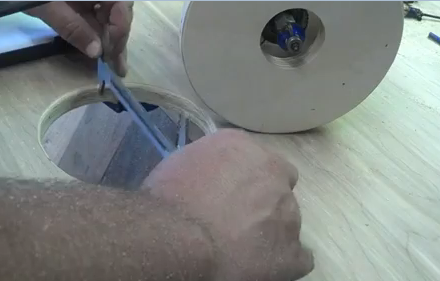
To cut out the hole in the boards I actually made a homemade mount for my rotozip then cut out a circle template that was just the right size to create a perfect 6 inch hole.
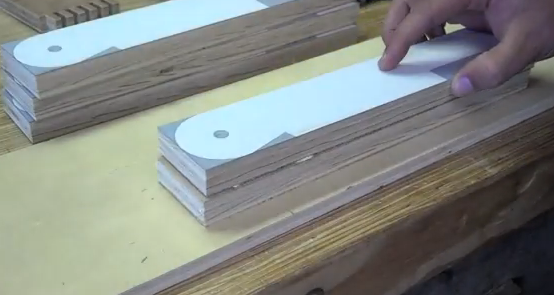
Next I built the legs. The legs are made of two layers of the 3/4 plywood.
One part of the leg support fits into the notch cut out in the legs and the second shorter layer fits between the legs as illustrated.
I installed the longer part first, glued and nailed in place then fit in the shorter piece.
The legs are designed to fit with enough room for two washers to fit between the legs and the frame. That way you can tighten the legs enough to where they don’t move around on their own.
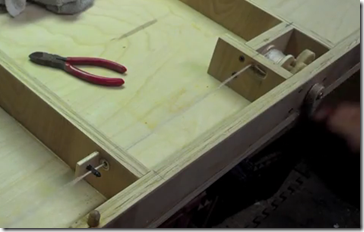
Making the twine retraction system is probably worthy of it’s own page, so if anyone is actually interested in making that part let me know and I’ll help out where I can.
That turned out to be a trial and error kind of thing, so a step by step plan would be somewhat difficult to come up with.
Here are a few tips that might help out if you try to build it.
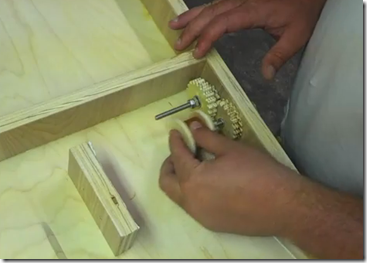
After you cut out the four gears and drill the holes for a 1/4” bolt you take one large and one small and glue them together. Use the 1/4” bolt and jam nut to hold it together while the glue dries.
make the spool with 1” dowel, two circular pieces of 1/4 plywood cut slightly larger than the dowel. Drill a hole directly in the center of the dowel and 1/4 inch plywood sides, then glue a small gear and the two plywood sides together held in place with a quarter inch bolt.
cut the handle out with the template and bolt everything together like in the video.
To get the hole spacing correct for the twine retraction system, use the template and drill through both the frame and small board at the same time. Use flat washers as spacers where ever necessary.
Category: Woodworking