Restoring my Table Saw
2014-08-03 written by: Brad
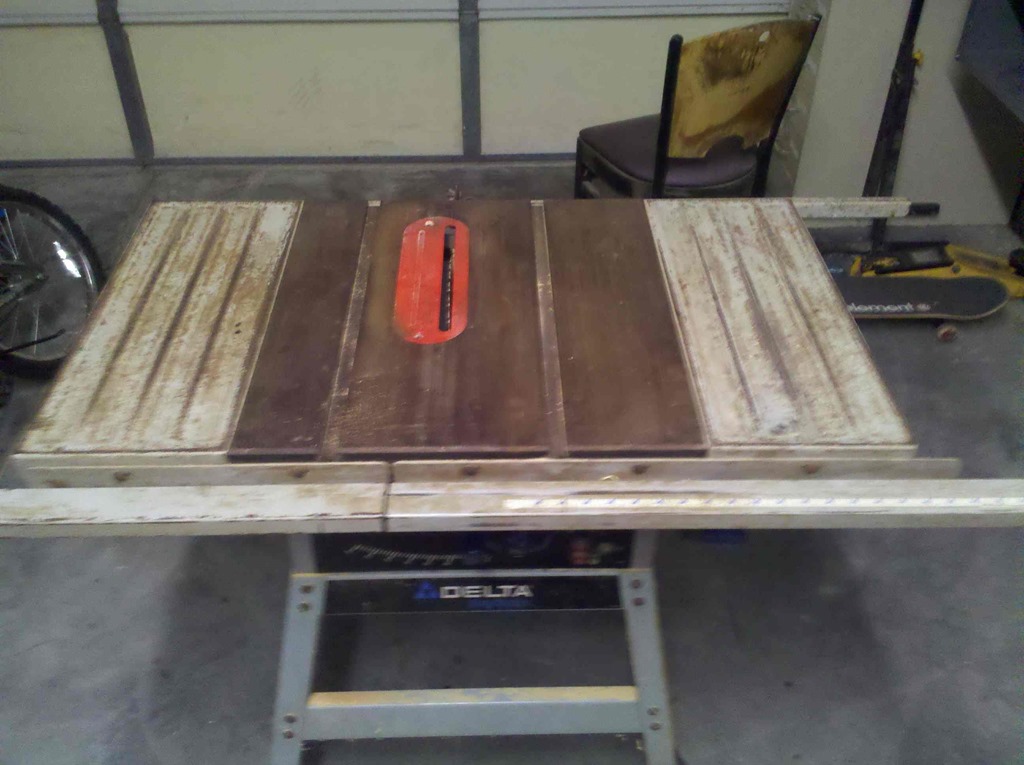
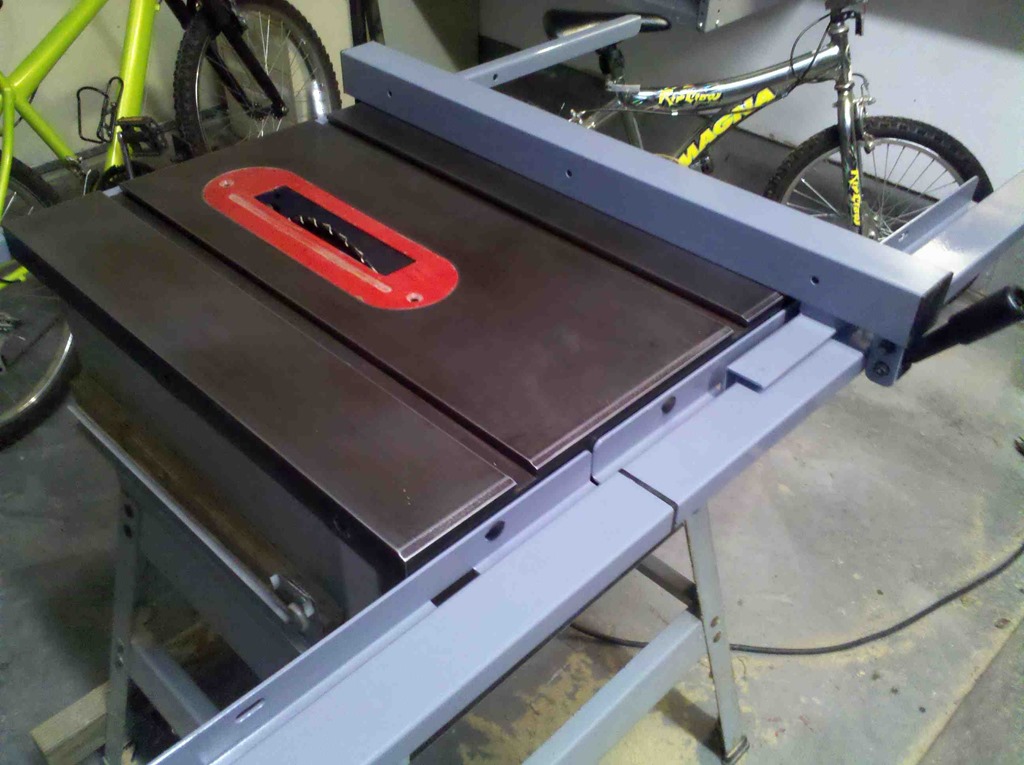
BEFORE
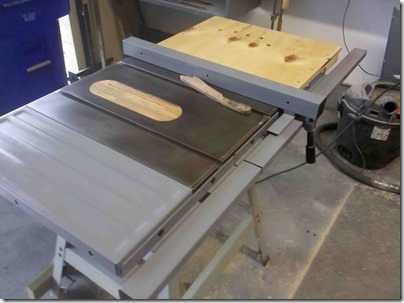
AFTER…What a difference!
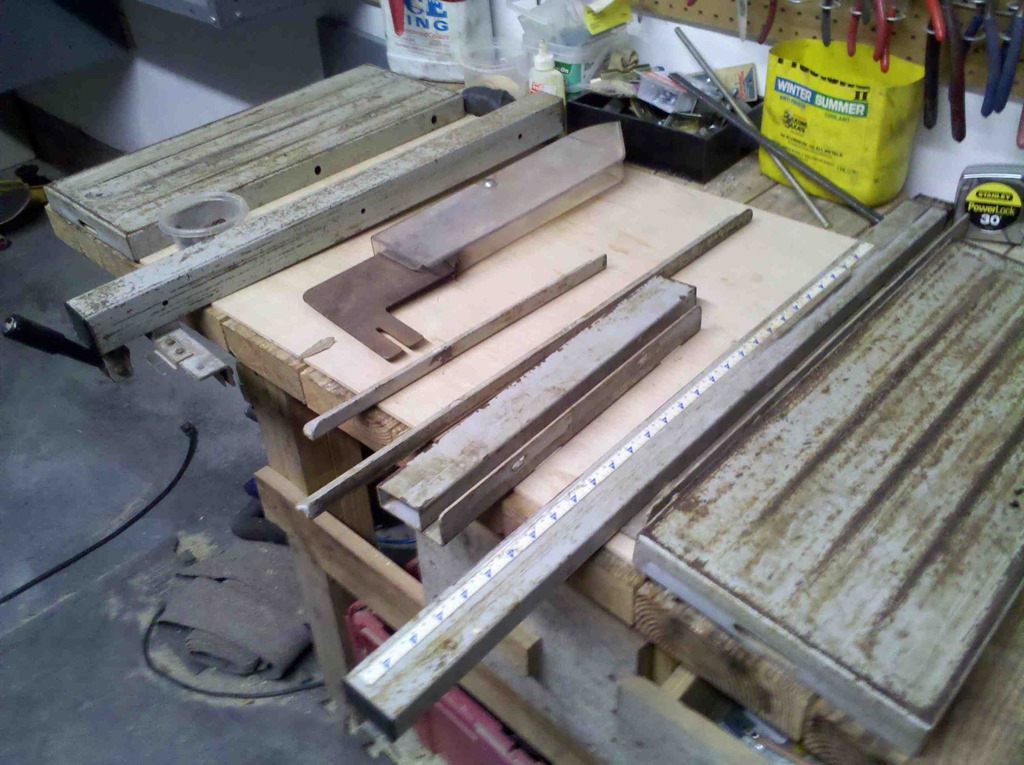
I started this project by removing the extension tables and side rails.
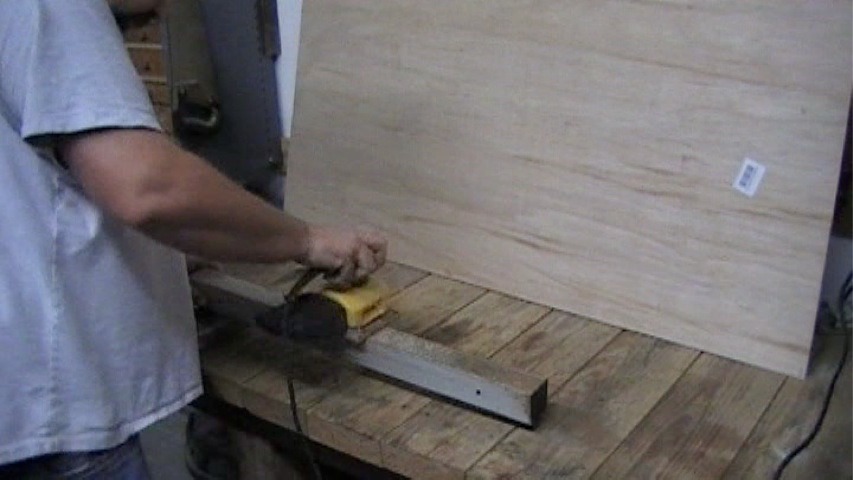
I used my orbital sander with 220 grit paper to remove the majority of the rust that had accumulated over the years.
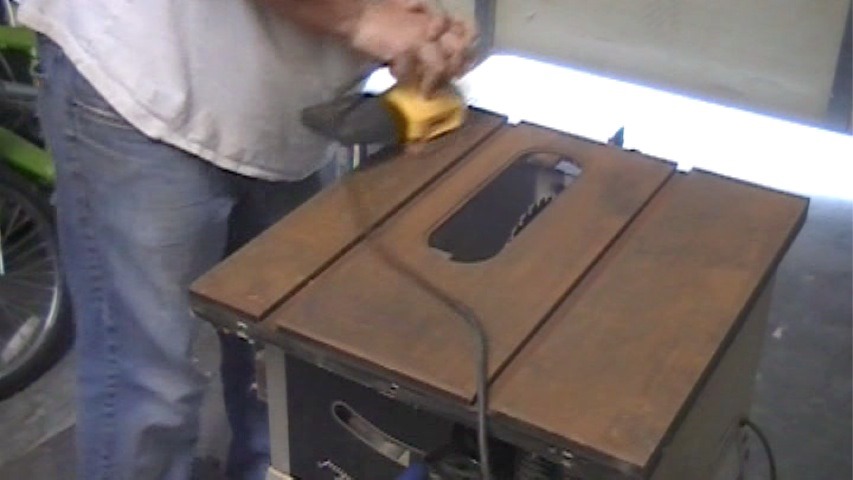
And Continued that process for the table top. The metal surface is pretty rough on the sandpaper. Do yourself a favor and change it out often. Also you should wear a respirator during the entire process.
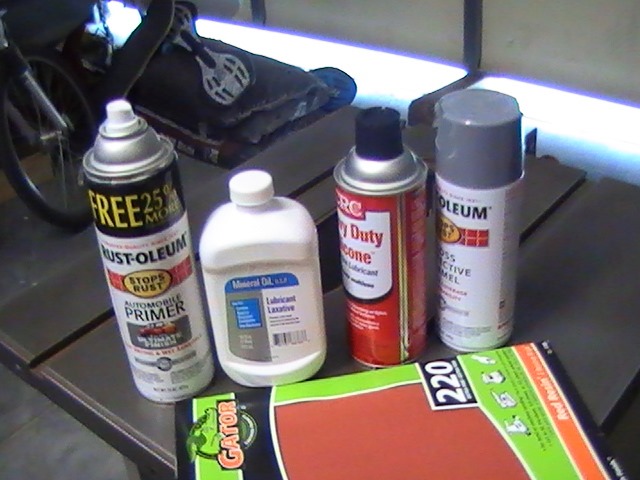
This is pretty much everything I used to resurface my table saw. The red can is a silicone oil, I found it in the section of the store that contains WD-40 and Liquid Wrench type items.The mineral oil was the true challenge to find. Turns out it is used as a laxative and can be found in the pharmaceutical section.I used Rust-oleum spray primer and paint. The primer ended up clogging up on me during the 3rd coat. I got about half the pieces with 3 coats and the rest were just 2. I put a total of 3 coats of paint after sanding the primer smooth.
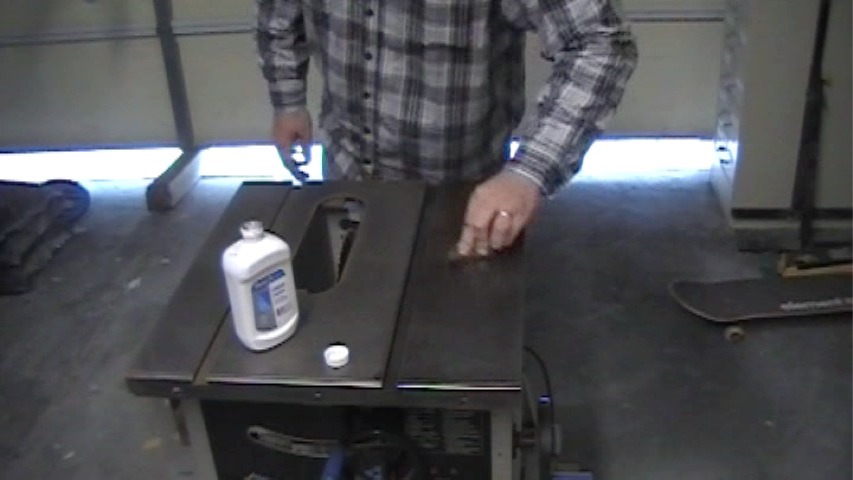
In this step I apply lots of mineral oil and rub it in vigorously with steel wool. I let it sit on there for a while because I was also applying coats of paint during this process to the side rails and fence.I had a hard time finding mineral oil at Wal-Mart.
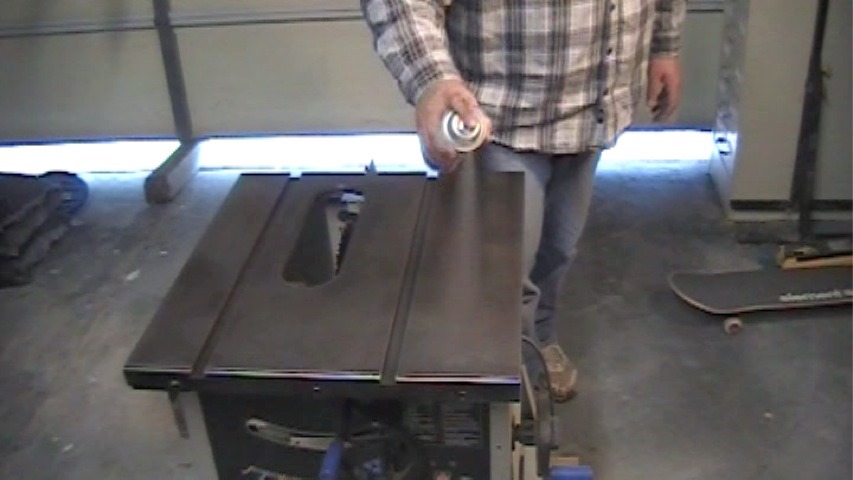
I am coating the tablesaw with silicone lubricant. According to the article I read at ehow.com, you should apply it to the surface and let it sit for around 5 minutes. Then wipe it completely off using a soft cloth and vigorously rubbing it in.
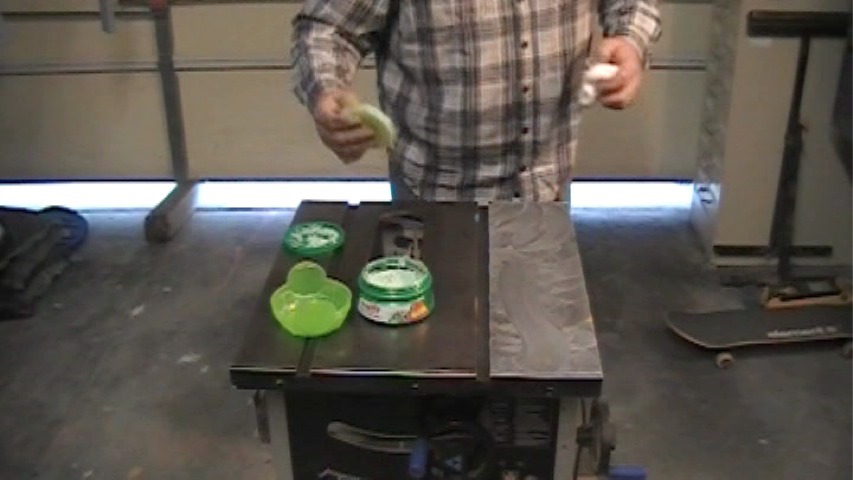
Finally I apply some wax, let it dry, then buff it off. It took about 2 hours to dry for me…I put a lot on there.I used regular car wax, time will tell how it holds up but it seemed to do just fine.At the end of this step you can really tell a difference. It is super smooth. Every time I go out to the garage I can’t help but rub my hand across the table saw.
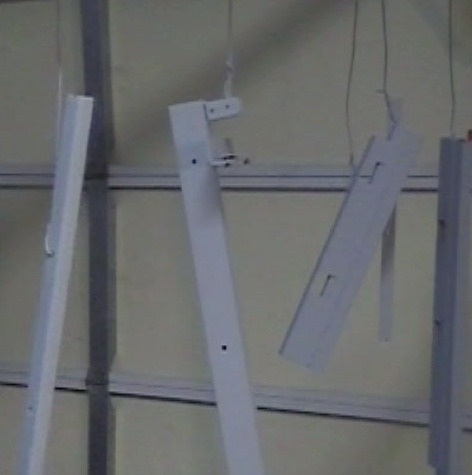
I hung the side rails and fence off of my garage door opener to apply the paint. I put at least two coats of primer (it clogged up on me during the 3rd coat) and 3 coats of paint on the parts.It is apparently extremely important to clear the paint nozzle between each coat, especially the primer. Do this by turning the can upside down and spraying until no paint comes out.
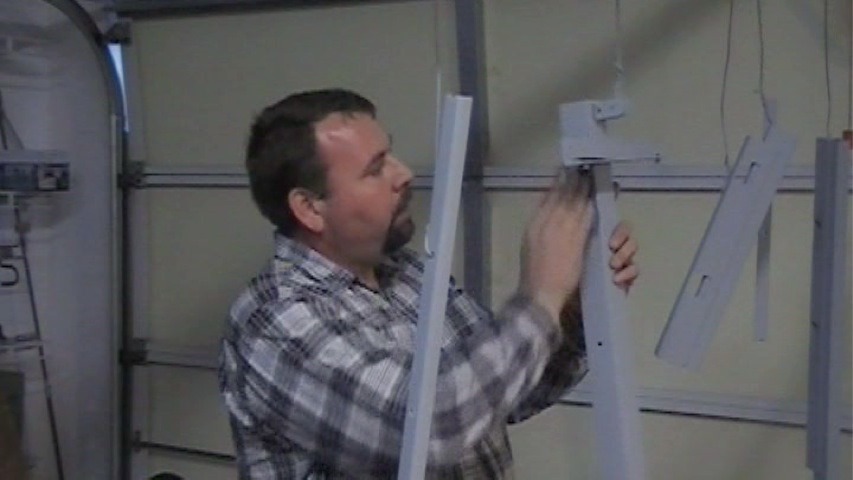
After finishing up the primer coats and letting it dry for about 2 hours, I did a light sanding job of all of the parts using steel wool. This really made a difference on the texture of the parts. The primer leaves a texture, but can be smoothed down fairly easily with the steel wool.
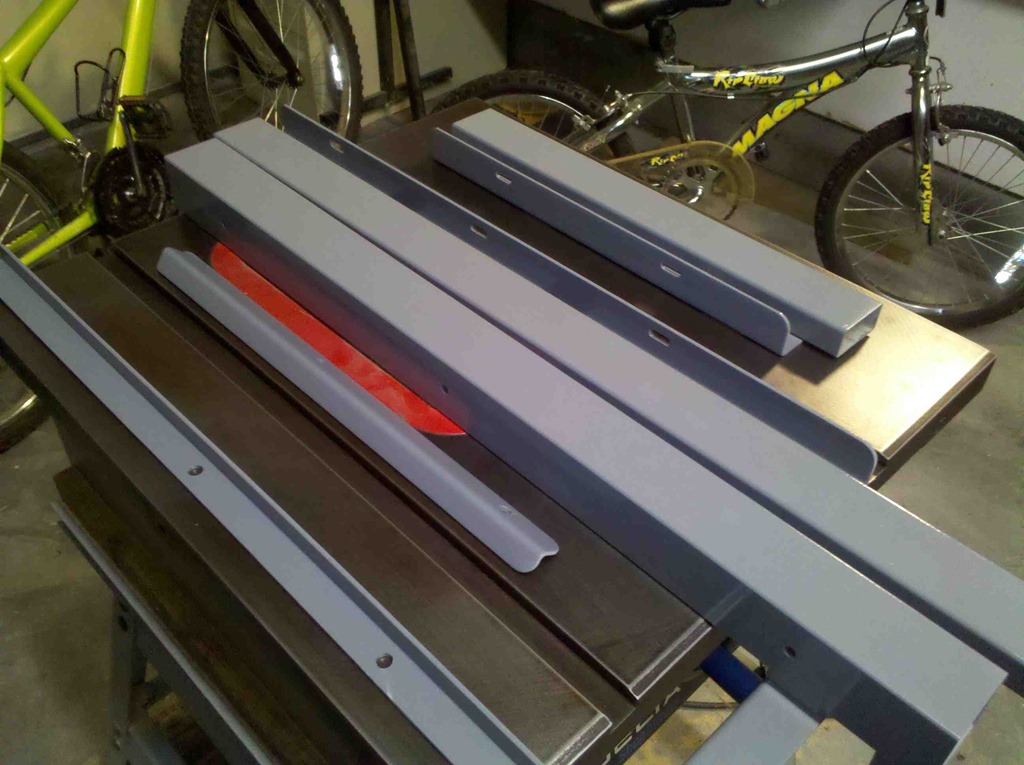
I am really surprised at how well the finish turned out. I had anticipated using the steel wool again to smooth out the finish, but it wasn’t necessary.
And this is the final product for this project. Check back later to see the extension tables I will add to the table saw.
Category: Miscellaneous Projects